How To Remove a SIM Card From The Nexus 5
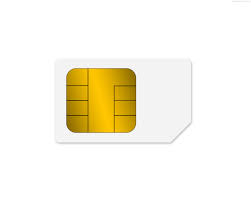
 Like most high-end smartphones sold today, the Nexus 5 features a small computer chip which contains a unique identification number as well as personal data associated with the owner/user. Known as a SIM card, it’s incredibly small and easy to miss if you aren’t careful. If you purchase a pre-owned Nexus 5, or if you change cell carriers, you’ll need to remove this computer chip.
Before we get started, it’s important to note that you’ll need either the SIM ejection tool (sold with the Nexus 5) or a small, thin needle. The ejection tool is preferred, as it won’t scratch or scuff your Nexus 5. You can still remove the SIM card with a pin, but you’ll need to use caution to avoid pressing the point against the body of your Nexus 5.
Another important piece of advice to follow is to ground yourself before attempting to remove the SIM card. Even small electrical charges, such as static electricity, can fry a delicate SIM card. Granted, SIM cards are relatively inexpensive, and some cell carriers will even give them away for free, but it’s a pain to obtain them nonetheless. To prevent the headache of having to obtain another SIM card, ground yourself by touching a piece of metal before you attempt to remove the SIM card.
Once you’ve acquired a SIM ejection tool or thin needle, locate the SIM tray on your Nexus 5. You can find this tray on the right-hand side of your device, with your device facing towards you. Next to the oval-shaped outline of the tray you should see a small hole. This is where you’ll need to use the ejection tool or pin. Simply place the tool/pin into the hole and gently press down until the tray pops out.
When the SIM tray is exposed, you’ll see a small computer chip nestled inside, at which point you can pull the SIM card out. If you intend to use a different SIM card with your Nexus 5, go ahead and place it back into the tray. With the SIM card located in the tray, you can push the tray into your Nexus 5. You should hear a subtle “clicking” noise which indicates the tray is secured in place.
Did this tutorial work for you? Let us know in the comments section below!


